
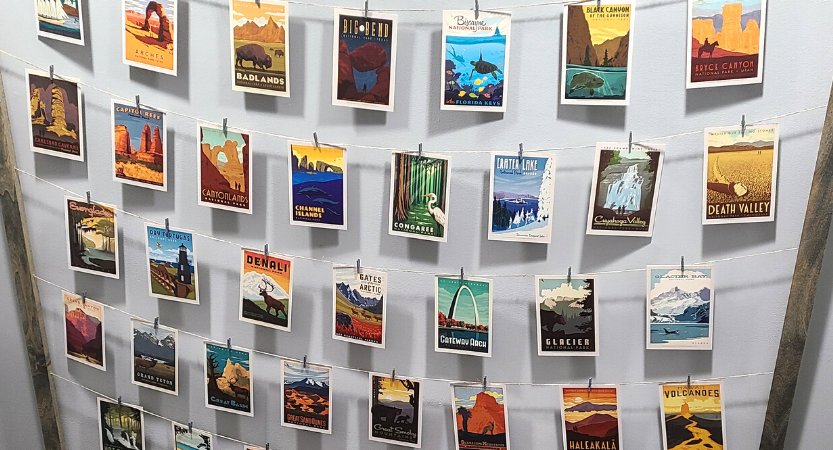
Postcard Wall Art Display
This art project is great if you want to display pictures or postcards of places you’ve been. I am a huge National Parks fan and wanted a unique way to display some artsy postcards. I haven’t been to all these parks or collected them on the way which would be cool but I bought a complete postcard set. It inspires me to want to check out the ones I haven’t been to.
Items you need
2 Wooden beams- can choose any size to liking but in this project used 6 ft x 1.5 inches x 3/4 inch
Wood stain- color of your choice
Twine
Mini clothesline clips
Power drill
Tweezers
Postcard/Picture Collection
Scissors
Ruler/Tape Measure
Paintbrush/cloth for staining
Paintbrush/cloth for staining
Stain the Wood beams and mini clothespins
You can pick whichever color of stain you would like. The best way to attach stain is to paint it on and then have a rag/old shirt to wipe away the excess stain. I recommend letting the stain fully dry before proceeding to the next steps.
Layout your design/calculate the holes
Laying out the postcards gave an idea of how many rows to fit on the beams and how far apart the beams would need to be. You could make this project wider to cover greater space on your wall or skinnier for a narrow portion on your wall. Either way figure out the space you want this to fit in and figure out how many pictures/postcards can fit and then measure out equal spacing on both sides. Make sure to measure on both beams so the string/twine lines up on each side. In this project we started the first hole 2 1/2 inches from the top and spaced each hole below that by 8 3/4 inches.
Drill the holes
I wanted a minimum hole to be able to get string through so I did just that on the inner part of the beam. For that hole I used a 1/8 drill bit. On the back I made a larger hole that would be easier to extract the string. When you drill the second hole you can stop when you feel the give from hitting the first hole and to prevent you from going through the front of the beam.
String the twine through holes
I cut twine with scissors longer than I anticipated I would need just in case. I also found that taping the end of the twine helped to prevent fraying and allowed for easier grabbing/retrieving from the back side holes. Since it is going at an angle through the beam using paperclip and tweezers to get it from the hole in the back of the beam. To secure the string, I did both a knot and then taped the remaining string to the back of the beam. The back holes and tape would be hidden against the wall. I allowed for a little slack to give the dip of the postcards but you could also pull the string taught if you prefer.
Attach beams to the wall
Using both command strips and nails this was hung to our stairway landing.
Add the postcards with the mini clothespins
Using the previously stained clothespins attach the postcards or pictures to the strings. Given the number of postcards some rows had 7 while others had 8. It gave more of a staggered look which I found appealing but you could also just evenly space them with the same number of postcards per row.
